Trail Trackerの組織へのインストール
Trail Trackerアプリと同期の設定
公開日 : 2022.11.10
Share:


当該製品は新規販売を終了しています。
この記事で学べること
- Trail Trackerのインストール方法
Trail Trackerのインストール
Trail Tracker アプリケーションを 以下AppExchange からダウンロードします。
https://appexchange.salesforce.com/appxListingDetail?listingId=a0N3A00000EFpAtUAL
緑の [Get It Now (今すぐ入手)] ボタンをクリックします。

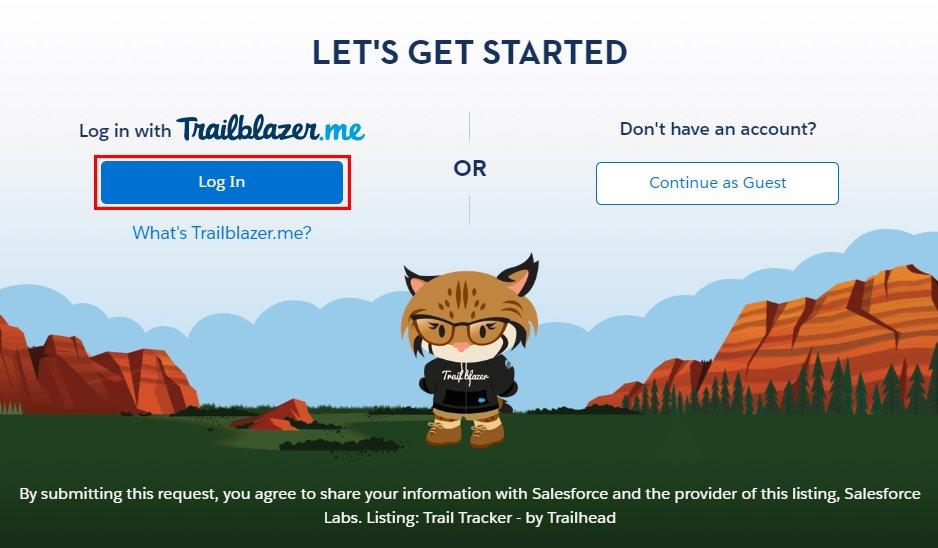
Salesforceに未ログインの状態だと、以下画面が表示されます。
画面左部の「Log In」ボタンより、Salesforceにログインします。
ログインが完了すると、以下ポップアップが表示されます。
ユーザ名を選択し、[Install in production (本番組織にインストール)] をクリックします。

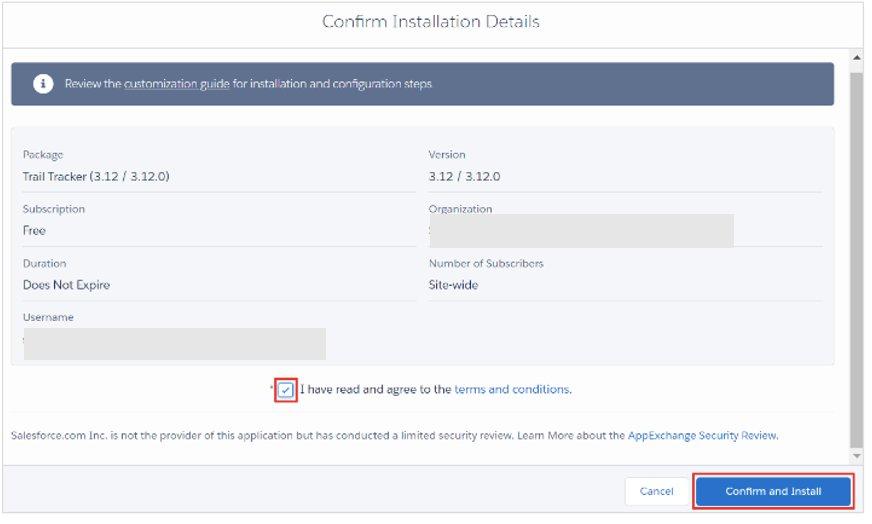
[I have read and agree to the terms and conditions (契約条件を読み、同意する)] をオンにし、[Confirm and Install (確認してインストール)] をクリックします。
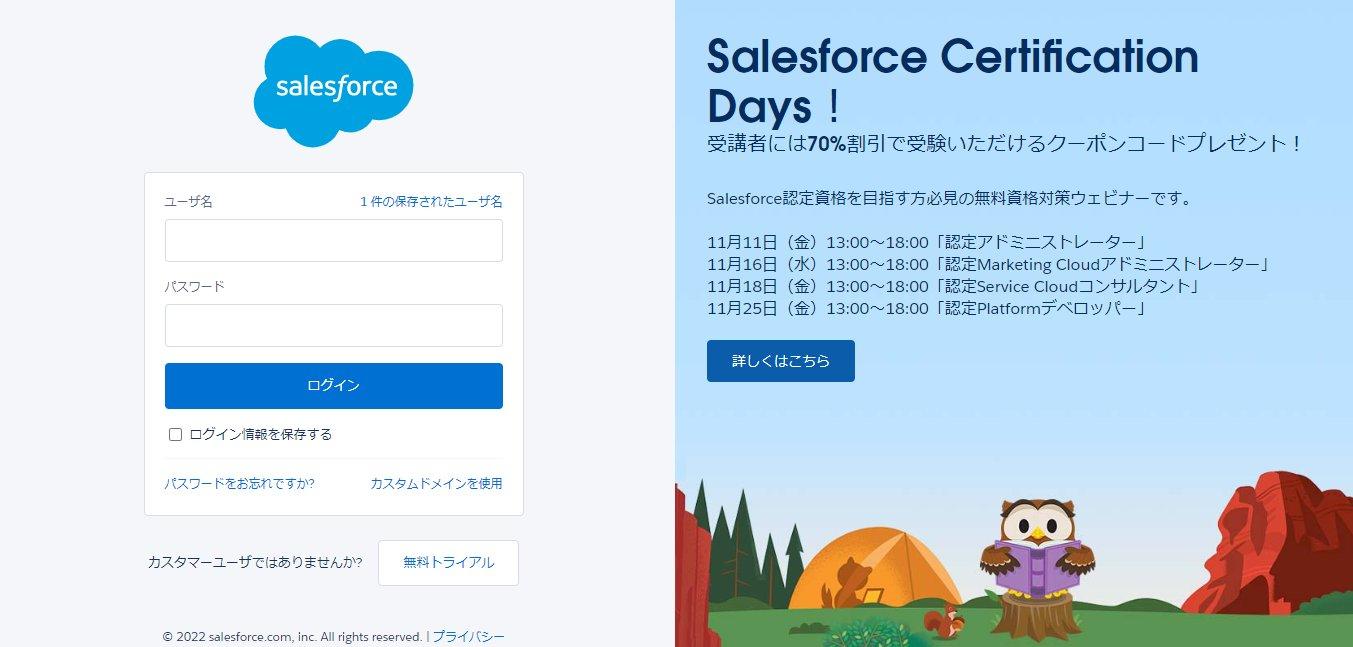
Salesforceのログイン画面が表示されるので、再度ログインを行います。
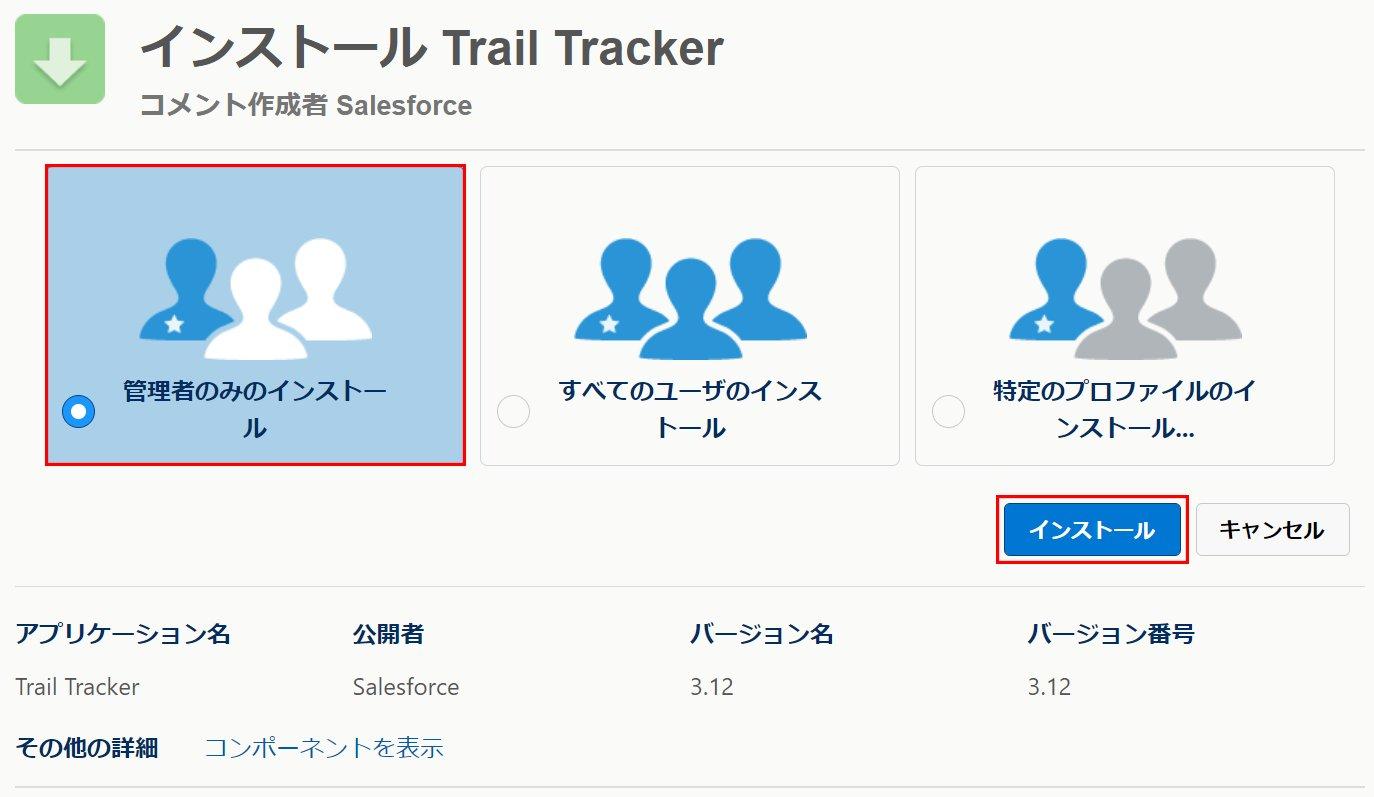
パッケージのインストール画面が表示されます。
[Install for Admins Only (管理者のみのインストール)] を選択して [Install (インストール)] をクリックします。
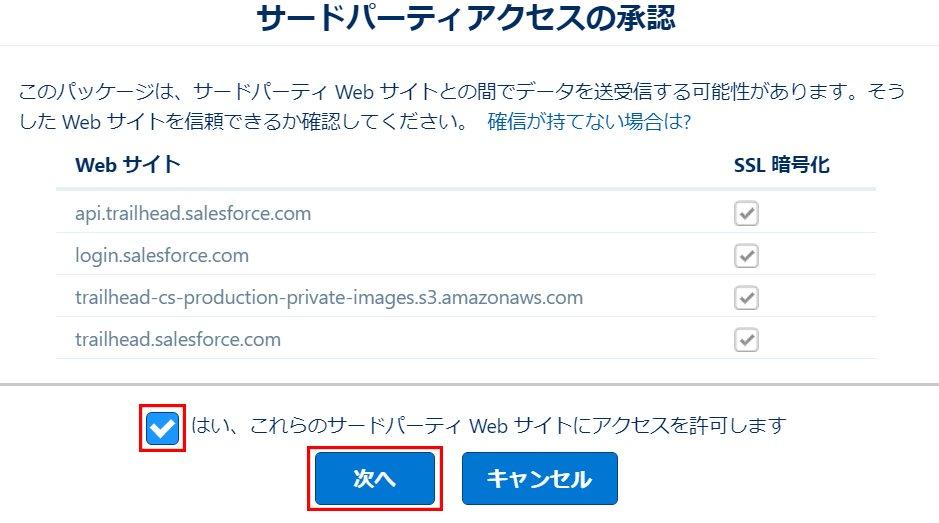
[Approve Third-Party Access (サードパーティアクセスの承認)] ポップアップが表示されます。
[Yes, grant access to these third-party web sites (はい、これらのサードパーティ Web サイトにアクセスを許可します)] をオンにし、[Continue (続行)] をクリックします。
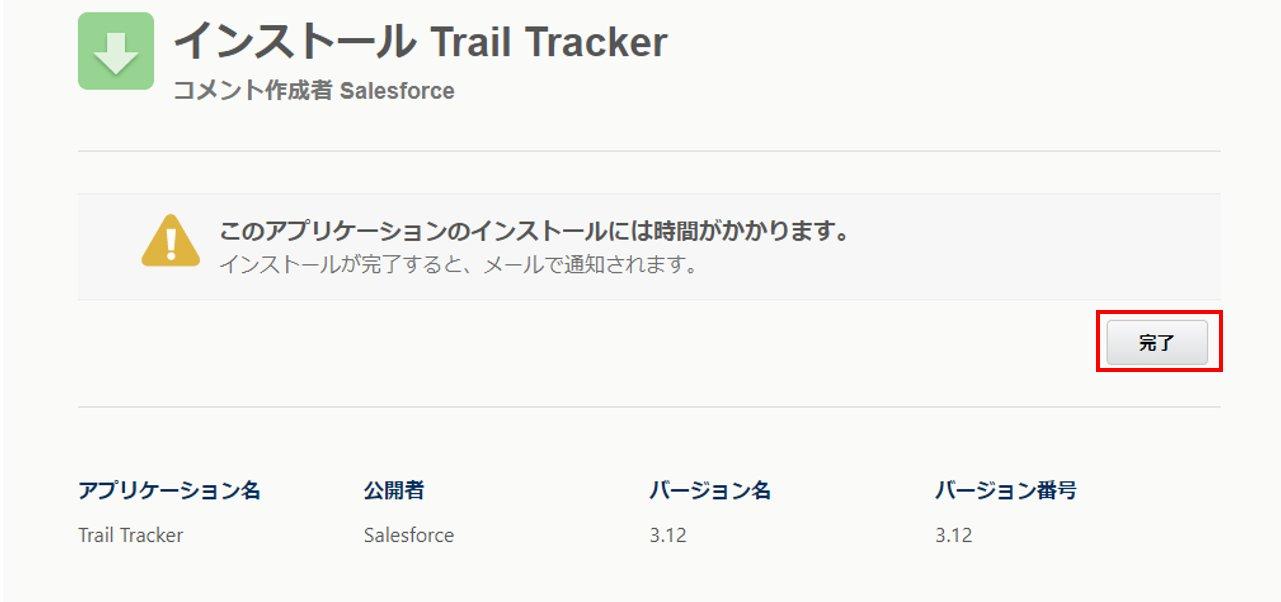
読み込み画面が表示されます。インストールプロセスには数分かかる場合があります。「完了」ボタンを押して、インストールが完了するのを待ちましょう。
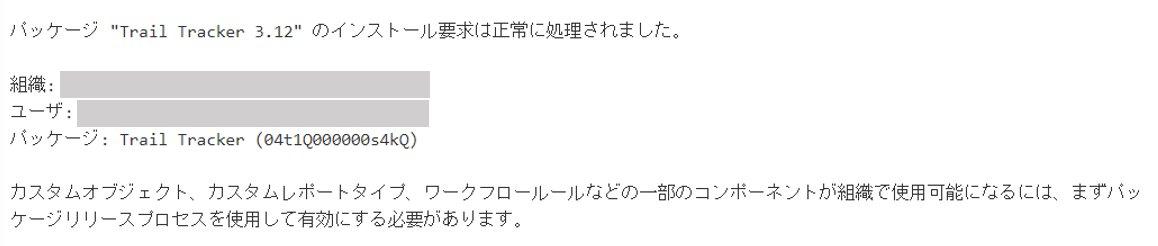
インストールが完了すると、Salesforce から次のようなメールが届きます。
ヒント:「パッケージ Trail Tracker のインストールが正常に終了しました」 という件名のメールが届きます。
これで、アプリケーションを設定する準備ができました。
タブの表示設定
Trail Trackerのインストール直後は、「デバッグログ」、「ユーザTrailmix」、「Trailmix割り当て」などのデフォルトでは表示されていないタブがあります。

Salesforceでのタブの表示設定を確認して、必要に応じてタブの表示設定を行いましょう。
https://help.salesforce.com/s/articleView?id=000385295&type=1
学習ツール
まとめ
Enablementサイトでの学習データをSalesforce組織に連携には「Trail Tracker」アプリケーションのインストールが必須です。インストールができたらデータの同期設定作業を実施しましょう。
https://successjp.salesforce.com/article/NAI-000607
公開日 : 2022.11.10
Share:
この情報は役に立ちましたか?
ご意見お待ちしております。
フィードバックありがとうございます。
より役に立つために
役に立たなかった一番の理由を教えてください。
Sales Enablement
-
システム基本構成
-
Trail Trackerアプリと同期の設定
-
コンテンツコレクションの活用
-
その他の初期設定